Back in December 2011, Little John friend Brian Kerridge gave everybody some pretty sound instructions regarding rewiring of this lathe. These instructions can be found at the "Files" section of the following Yahoo Group http://groups.yahoo.com/group/RaglanMachineTools/. For those of you, who are not members, you can have a look at his documentation here (... and Brian, forgive me for taking this liberty; please, let me know if there is any copyright conflict).
"What makes rewiring difficult is that the wiring layout is poorly designed by today’s standards and most inaccessible. First, it’s not easy to remove just the switch or just the motor. As regards the switch, there’s so little room in the switch cavity to pack enough loose wire to enable you to withdraw the switch. Also, if you need to change the mains input cable for any reason it’s hard to work the new wire through the tight corners in the small wiring box and then through the curved conduit from the box to the back to the switch cavity."
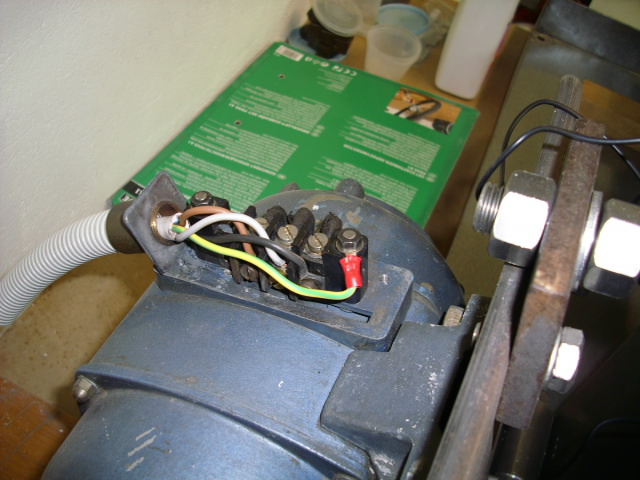
If one does not care too much for preserving the original design, then find in the next five photos an alternative way of rewiring. It involves some minor modification of the headstock cover. In this case, I had to hand saw away the original small wiring cavity, clearly depicted in Brian's nice detailed photos, and replace it with a conduit PVC box, easy to find in the market. The box was attached to the headstock with a couple of M4 feed through bolts with nuts. Then, rest was easy: wire connections could be done in the box, as per the forth photo. Straps were used to secure the cables and prevent them from sliding gradually within the conduits and become loose and dangerous etc. It is suggested to use more than one per cable. Note, that the motor of this lathe is three phase. Cable colours are not the same as those at Brian's document. Earth (the yellow green cable) is attached to the motor body in the wire connecting box of the motor, as per the last photo in the list. Personally, I did this new cable arrangement to allow for an easier future connection of a frequency drive (inverter). I will keep you informed regarding this project as well. Enjoy.
 |
| Photo 1 |
 |
| Photo 2 |
 |
| Photo 3 |
 |
| Photo 4 |
 |
| Photo 5 |
Petropoulos, N.P., "Raglan Little John Mk.2 Bench Lathe - Post 1 - Rewiring", 2012; add URL; add access date.
Any citation will be much appreciated.